Posts

Crochet Name Doily - Part 3 - Starting Your Doily

Image
Here's where we start our actual doily!! Things you will need: 1) Size 10 thread in desired color 2) Size 7 (1.65mm) steel crochet hook 3) Pattern for desired name Below, I have an image of my pattern for my doily. Notice the bold lines to help delineate the border. Get your thread and hook ready!  Time to start your doily! Keep your eyes peeled for Part 4 - Adding a Border

Crochet Name Doily - Part 2 - Creating a Name Doily Chart

Image
Welcome back!! Here is Part 2 of our Name Doily Tutorial! Things you will need: 1) Grid Paper (you can find free printable versions online or buy a pad of it at the store) 2) Pencil (Trust me, you don't want to use pen.  You could make errors in charting or even decide to go back to adjust the letter pattern after your finished charting.) 3) Font Pattern (You can find these online, on Pinterest, or make up your own!  I choose to find them online/Pinterest.)  Fancy fonts are more difficult, so keep that in mind when looking. Here is a sample font that I used for a doily recently. For simplicity sake, I will use the pictured font above in the video tutorial.  Have your pencil and paper ready! As recommended in the video, draw out the  entire name before starting work on your doily. Here is what it looked like when I used the Excel sheet to chart the letter. Note that I still added a bold line two rows above and two rows below ...

Crochet Name Doilies - Part 1 - Mastering the Techniques

Image
Ok folks, here is my first attempt at a crocheting tutorial, so bear with me. Since I recently did several name doilies for Christmas and had a request from a friend to teach her how to do this.  "Absolutely!" was my response. 😉 I have posted the video below. Part 1 is for the BEGINNER, reviewing how to chain and double crochet and the basics of creating the foundation of a name doily. We will use an H/5.00mm hook and worsted weight yarn for practice. Watch Part 1A & Part 1B Below is a diagram of what the structure should look like. Below is the drawn pattern for the practice project. I have added the border rows on this chart to make it easier for beginners to see the spacing on your practice project.  These border rows may not be on other patterns found online. Here is the image of my finished product. As promised, this is the link to the site that I learned from when I first started doing name doilies! http://w...

Candy Hearts Tutorial

Image
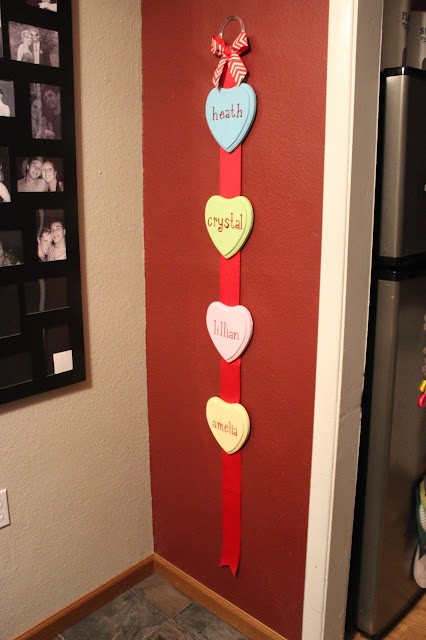
Here is a step-by-step on how I made my personalized candy hearts decor.  I originally got the idea from another crafter and decided to make my own.  I will describe the step and place the picture directly below.  Here goes! I purchased 6 3/4" by 7 1/2" wooden heart plaques from Michaels and painted them with lightened colors I had on hand to be similar to traditional candy hearts. I couldn't find a font that I liked to model my letters off of, so I free-hand sketched all of our names out as seen below.  (I ended up redoing "heath" and "crystal" after I took this picture in order for the letters to be closer together.)  If you have a font you like, you can print the names out and color over them with pencil, using the same mirror transfer technique described below.  Or cut the names out on red vinyl with a Cricut/Sillouette/etc. I then flipped this page onto the opposite page and pressure rubbed the lead onto the opposite page to get...

The Very Hungry Caterpillar Toy

Image
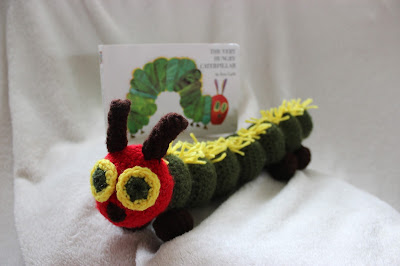
Very Hungry Caterpillar Toy I fell in love with this concept and decided it will make a great gift for friends who are having a baby and not knowing the gender before its birth.  I got the free pattern from Ravelry created by Gillian Dite .    Learning from experience after making my first one, I discovered that it is much easier to make all the parts (eyes, antenae, feet) first and attach them to the body as you go.  I still did the yellow back yarn at the end of the project. So far, I have made three of these little guys and got the board book version of The Very Hungry Caterpillar from Walmart to give as a gift set to expecting couples! Other variations I'm looking forward to trying soon are a pink, purple, and teal "girlie" version (which obviously won't match the book, but will still be adorable) and simply adding a small rattle inside the middle section of the toy for added appeal for the little ones! Stay tuned for pictures of the ...

Very Hungry Caterpillar Hat & Cocoon

Image
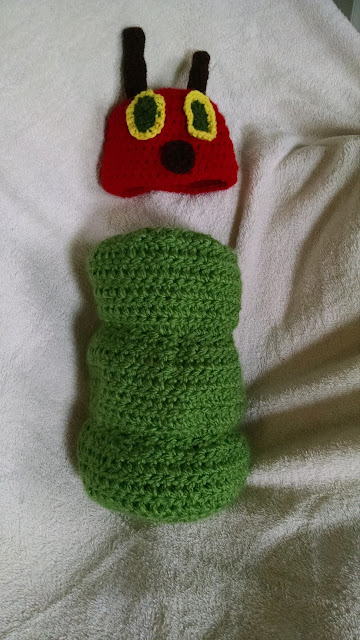
There are a variety of patterns out there for similar projects as this, but I couldn't find one for the cocoon using bulky yarn.  I created this as I went and I think it turned out pretty decent.  It is intended to fit a newborn, but my little one hasn't arrived yet, so I haven't had the chance to test it out. The pattern is available at my Etsy shop - Yellow Lily Crafts .  Enjoy!

The Very Hungry Caterpillar Crochet Hat

Image
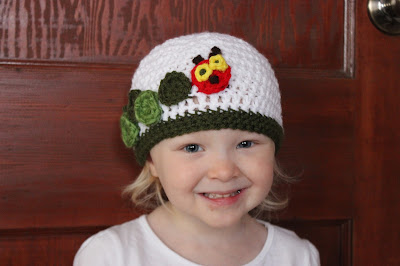
The Very Hungry Caterpillar Crochet Hat I got this idea and used part of the pattern from  Crochet D Lane . I chose to use a double crochet hat pattern from Oombawka Crochet Design instead of the original half-double crochet hat base that was included by Crochet D Lane.  I simply tried it on my daughter as I went and when the sizing was right, I added 3 rounds of single crochet in the green yarn. Can't wait to get a shot of my beautiful girl reading this favorite book to her new little sister with her hat on!